Transfer Data to New iPhone – Transferring data to a new iPhone can be a simple and straightforward process if you follow the right steps.
Whether you are upgrading to a new iPhone or just getting a replacement device, you can easily move your important data such as contacts, photos, messages, and more from your old iPhone to your new one.
There are several methods you can use to transfer data to a new iPhone, including using iCloud, iTunes, or a third-party app.
Each method has its advantages and disadvantages, depending on the type and amount of data you want to transfer, your internet connection, and your personal preferences.
In this guide, we will explore the different ways you can transfer data to your new iPhone, step by step, to help you find the method that works best for you.
Transfer Data to New iPhone after Setup with 3 Ways
We will also provide some tips on how to prepare your old iPhone for the transfer, how to troubleshoot common issues, and how to ensure that your data is safe and secure during the transfer process.
Read More:-
- How to Transfer Contacts from Android to iPhone
- How To Transfer Your Music From iTunes To Android In 2023
Part 1: Transfer Data to New iPhone after Setup from PC
If you’ve got your data on a PC and wondering how to transfer data to a new iPhone after setup, this section has got you covered.
1. Use Tenorshare iCareFone
Another option for transferring data to a new iPhone from a PC is to use third-party software like Tenorshare iCareFone.
This tool allows you to selectively transfer data from your old iPhone to your new one without having to create a full backup of your device. Here’s how to use iCareFone to transfer data:
Step 1: Download and install Tenorshare iCareFone on your PC.
Step 2: Connect your old iPhone to your PC and launch iCareFone.
Step 3: Click on the “Backup & Restore” tab and select “Backup Device” to create a backup of your old iPhone.
Step 4: Once the backup is complete, disconnect your old iPhone and connect your new iPhone to your PC.
Step 5: Click on the “Backup & Restore” tab again and select “Restore Backup to Device.”
Step 6: Choose the backup you just created for your old iPhone and select the data you want to transfer to your new iPhone, such as contacts, messages, photos, and more.
Step 7: Click on “Restore” and wait for the process to complete.
Step 8: Once the restore process is finished, disconnect your new iPhone from your PC and verify that all your data has been transferred successfully.
Note: Tenorshare iCareFone is a paid software, and the cost may vary depending on the version you choose. Before using iCareFone, make sure to read the instructions carefully and back up your data to avoid any data loss.
2. Use File Explorer or Finder
If you prefer to transfer data to your new iPhone without using any third-party software, you can use File Explorer on Windows or Finder on Mac to transfer data manually.
Here’s how to transfer data using File Explorer or Finder:
Step 1: Connect your old iPhone to your PC using a USB cable.
Step 2: Open the file explorer on your Windows PC or Finder on your Mac.
Step 3: Click on your iPhone under “This PC” or “Devices” in the left-hand menu.
Step 4: Select the data you want to transfer, such as photos, videos, music, or documents.
Step 5: Copy the selected files to a folder on your PC.
Step 6: Disconnect your old iPhone from your PC and connect your new iPhone.
Step 7: Open the file explorer on your Windows PC or Finder on your Mac.
Step 8: Click on your new iPhone under “This PC” or “Devices” in the left-hand menu.
Step 9: Navigate to the folder where you saved the data you want to transfer.
Step 10: Drag and drop the selected files to your new iPhone.
Step 11: Wait for the transfer to complete and disconnect your new iPhone from your PC.
Note: This method is suitable for transferring a small amount of data, and it may not be suitable for transferring large files or complex data like contacts or messages.
If you need to transfer a large amount of data or want to transfer data like contacts or messages, it is recommended to use iCloud, iTunes, or third-party software like Tenorshare iCareFone.
If you are using a Windows computer:
If you are using a Windows computer, you can transfer data from your old iPhone to your new iPhone using the following methods:
- iTunes: As I mentioned earlier, you can use iTunes to create a backup of your old iPhone and then restore that backup on your new iPhone. This method allows you to transfer all your data, including settings, apps, messages, and more.
- Tenorshare iCareFone: Tenorshare iCareFone is a third-party software that allows you to selectively transfer data from your old iPhone to your new one without having to create a full backup of your device.
- File Explorer: You can use the file explorer on your Windows PC to transfer data manually. This method is suitable for transferring a small amount of data, such as photos, music, or documents.
- iCloud: You can use iCloud to back up your old iPhone and then restore that backup on your new iPhone. This method requires an internet connection and may take some time, depending on the size of your data.
To choose the best method for transferring data to your new iPhone, consider the amount and type of data you want to transfer, your internet connection, and your personal preferences.
If you are using a Mac:
If you are using a Mac, you can transfer data from your old iPhone to your new iPhone using the following methods:
- Finder: With macOS Catalina or later, you can use Finder to transfer data from your old iPhone to your new iPhone. Connect your old iPhone to your Mac, open Finder, and click on your old iPhone under “Locations” in the left-hand sidebar. From there, you can select the data you want to transfer, such as photos, videos, music, or documents, and drag and drop them onto your new iPhone.
- iTunes: If you are running an older version of macOS that supports iTunes, you can use iTunes to create a backup of your old iPhone and then restore that backup on your new iPhone. This method allows you to transfer all your data, including settings, apps, messages, and more.
- iCloud: You can use iCloud to back up your old iPhone and then restore that backup on your new iPhone. This method requires an internet connection and may take some time, depending on the size of your data.
- Tenorshare iCareFone: Tenorshare iCareFone is a third-party software that allows you to selectively transfer data from your old iPhone to your new one without having to create a full backup of your device.
To choose the best method for transferring data to your new iPhone, consider the amount and type of data you want to transfer, your internet connection, and your personal preferences.
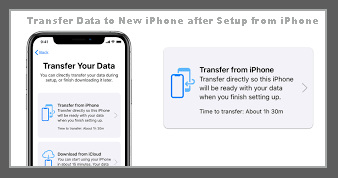
Part 2: Transfer Data to New iPhone after Setup from iPhone
If you’ve already set up your new iPhone and want to transfer data from your old iPhone to your new iPhone, you can use the following methods:
- Quick Start: Quick Start is an Apple feature that allows you to transfer data wirelessly from your old iPhone to your new iPhone. Make sure both iPhones are running iOS 12.4 or later and have Bluetooth turned on. Then, place your old iPhone next to your new iPhone, and follow the on-screen instructions to set up your new iPhone and transfer your data.
- iCloud: You can use iCloud to back up your old iPhone and then restore that backup on your new iPhone. This method requires an internet connection and may take some time, depending on the size of your data.
- iTunes: You can use iTunes to create a backup of your old iPhone and then restore that backup on your new iPhone. This method allows you to transfer all your data, including settings, apps, messages, and more.
- AirDrop: AirDrop is an Apple feature that allows you to wirelessly transfer photos, videos, contacts, and other data between two iPhones. Make sure both iPhones have AirDrop turned on and are connected to the same Wi-Fi network or have Bluetooth turned on. Then, select the data you want to transfer on your old iPhone and tap the share icon. From there, select your new iPhone as the recipient, and accept the transfer on your new iPhone.
To choose the best method for transferring data to your new iPhone, consider the amount and type of data you want to transfer, your internet connection, and your personal preferences.
1. Restore iTunes Backup(Overwrite Data)
If you want to transfer data from an iTunes backup to your new iPhone and don’t mind overwriting the existing data on your new device, you can use the following steps:
- Connect your new iPhone to your computer using a lightning cable.
- Open iTunes on your computer and select your new iPhone from the list of devices.
- Click on the “Restore Backup” button under the “Backups” section.
- Select the backup you want to restore from the drop-down menu and click on “Restore.”
- Wait for iTunes to restore your backup onto your new iPhone. This process may take several minutes to complete.
- Once the restore is complete, your new iPhone will restart and display the data from the backup.
It’s important to note that restoring from an iTunes backup will overwrite any existing data on your new iPhone.
If you want to keep the data on your new device, make sure to back it up before restoring the backup from your old iPhone.
2. Use Tenorshare iCareFone
Tenorshare iCareFone is a third-party software that allows you to selectively transfer data from your old iPhone to your new iPhone without having to create a full backup of your device.
Here are the steps to transfer data using Tenorshare iCareFone:
- Download and install Tenorshare iCareFone on your computer.
- Connect both your old and new iPhones to your computer using lightning cables.
- Launch Tenorshare iCareFone and select “Transfer Device Media to iTunes/PC.”
- Select the files you want to transfer from your old iPhone to your new iPhone. You can choose from photos, videos, music, contacts, messages, and more.
- Click on “Export” to transfer the selected files from your old iPhone to your computer.
- Disconnect your old iPhone and connect your new iPhone to your computer.
- Select “Import” and choose the files you exported from your old iPhone to transfer them to your new iPhone.
Using Tenorshare iCareFone to transfer data allows you to be more selective with the data you transfer and does not overwrite any existing data on your new iPhone.
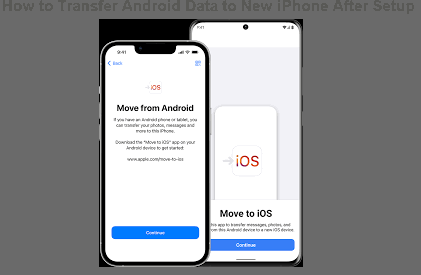
Part 3: How to Transfer Android Data to New iPhone After Setup
Transferring data from an Android device to an iPhone can be a bit more complicated than transferring data between two iPhones.
However, there are a few methods you can use to transfer your Android data to your new iPhone:
- Use the “Move to iOS” App: Apple’s “Move to iOS” app allows you to transfer your contacts, messages, photos, videos, bookmarks, and email accounts from your Android device to your new iPhone. To use this method, you need to have your new iPhone set up but not fully activated. Follow these steps: a. Download and install the “Move to iOS” app from the Google Play Store on your Android device. b. On your new iPhone, go to the “Apps & Data” screen during the setup process and select “Move Data from Android.” c. Follow the on-screen instructions and enter the security code displayed on your new iPhone. d. On your Android device, select the data you want to transfer to your new iPhone. e. Wait for the transfer to complete.
- Use a Third-Party App: There are several third-party apps available that can help you transfer data from your Android device to your new iPhone. Some popular options include a. AnyTrans: AnyTrans is software that allows you to transfer data between iOS and Android devices. You can use it to transfer contacts, messages, photos, music, and more. b. MobileTrans: MobileTrans is another software that allows you to transfer data between iOS and Android devices. It supports the transfer of contacts, messages, photos, videos, and more. c. Shareit: Shareit is a free app that allows you to transfer files between Android and iOS devices. It supports the transfer of photos, videos, music, and documents.
- Manually Transfer Data: If you don’t want to use an app or software, you can manually transfer your data from your Android device to your new iPhone. This method may take more time and effort, but it allows you to have more control over the data you transfer. Here are some common data types and the methods for transferring them: a. Contacts: You can transfer your contacts by syncing them to your Google account and then syncing your Google account to your new iPhone.b. Photos and Videos: You can transfer your photos and videos by connecting your Android device to your computer and transferring the files to your computer. Then, connect your new iPhone to your computer and transfer the files to your new device using iTunes or a third-party app like AnyTrans.c. Music: You can transfer your music by syncing it to your computer and then transferring it to your new iPhone using iTunes or a third-party app like AnyTrans.
Overall, transferring data from an Android device to an iPhone requires some extra steps, but it is possible with the help of apps, software, or manual methods.
Conclusion
Transferring data to a new iPhone can be a daunting task, but with the right tools and methods, it can be done quickly and easily.
If you are transferring data from a previous iPhone, you can use iTunes backup or a third-party software like Tenorshare iCareFone. On the other hand,
if you are transferring data from an Android device, you can use Apple’s “Move to iOS” app, third-party apps like AnyTrans and MobileTrans, or manually transfer your data.
Regardless of the method you choose, make sure to follow the instructions carefully to avoid any data loss or corruption.


